Graphics
![]()
When the active cell contains an image, the graphics options will be enabled.
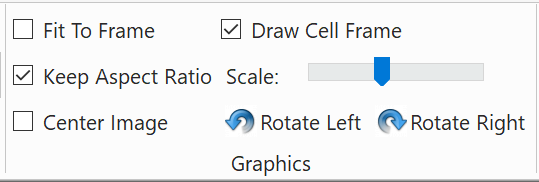
- Default options are Fit To Frame and Keep Aspect Ratio.
- Keep Aspect Ratio maintains the width-height ratio; the scale button works whether this is checked or not.
- The Scale button is disabled if the Fit To Frame option is selected.
- Clicking the Scale button opens an information box where an exact degree of scale can be set.

- The Center Image and Fit To Frame boxes cannot be used together.
- The Draw Cell Frame and Rotate Left/Right are self-explanatory.
Additional Information
Right-clicking on an image/image cell will open a list of options.
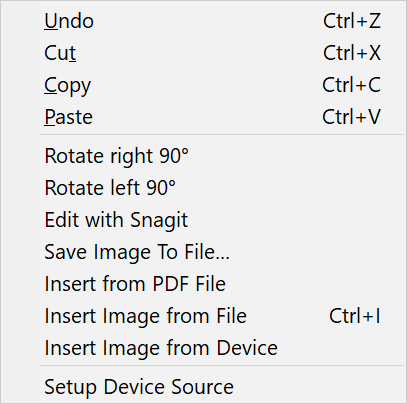
- Available options will be enabled, not “grayed” out.
- The first four options are self-explanatory.
- To rotate an image 90 degrees Right or Left, use those options.
- For details about how to edit it with Snagit, check the Snagit section of this document.
- To save an edited image as a new file on your computer, choose Save Image To File.
- To insert a PDF into the image cell or an exhibit cell, choose Insert from PDF File.
- To insert an image from the computer without using the Photo Sheet, choose the Insert Image from File option.
- To insert an image directly from a scanner or a camera, choose Insert Image from Device. The device must be set up first.
- To set up an outside image device source, choose Setup Device Source.