File - Preferences
![]()
To set Preferences in ClickForms, first click the File Tab
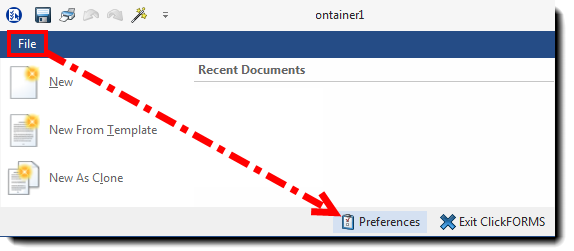
…and the click the Preferences button at the bottom of the window to open the dialog box.
There are 3 main sections in the Preferences box: Application, Document, and AgWare, each of which is collapsible.
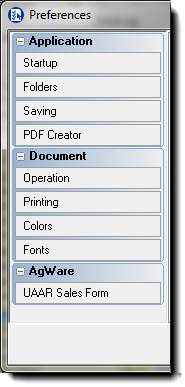
Application
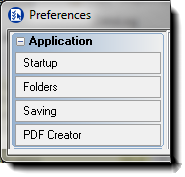
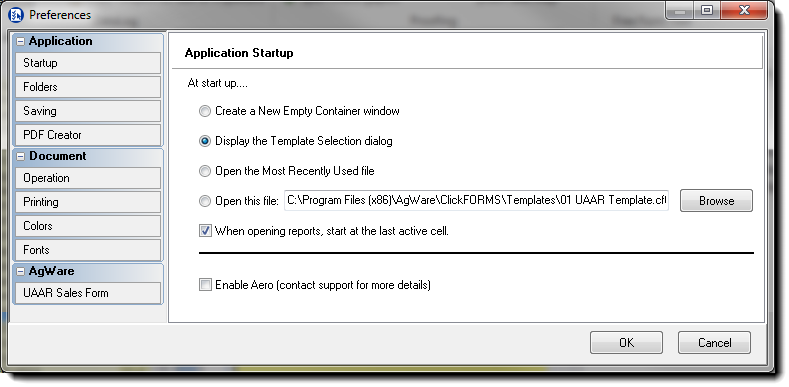
Startup
Is always displayed when the Preferences window first opens.
Here the user can choose what ClickForms does when it first opens. There are four choices.
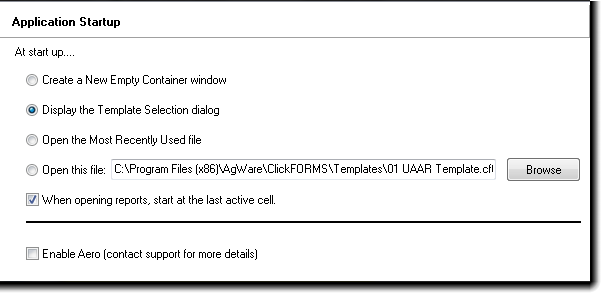
When ClickForms opens it can initially:
Open a new window that is empty of any pages.
Show the list of available templates
Open the most recently active report file
Open a specific template or .clk file – selected by using the Browse button.
To set the cursor automatically to the last active cell in a report, check the check-box for that option.
Folders
Shows the configuration for several application folders.
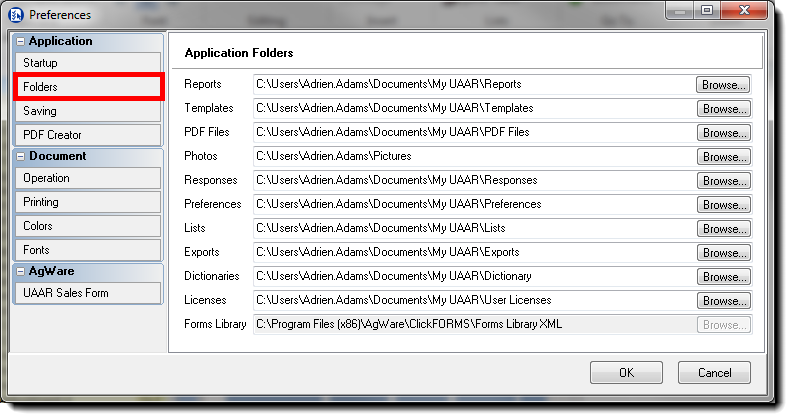
AgWare recommends leaving the default pathways as they are. If there is need to make a change, contact AgWare for assistance.
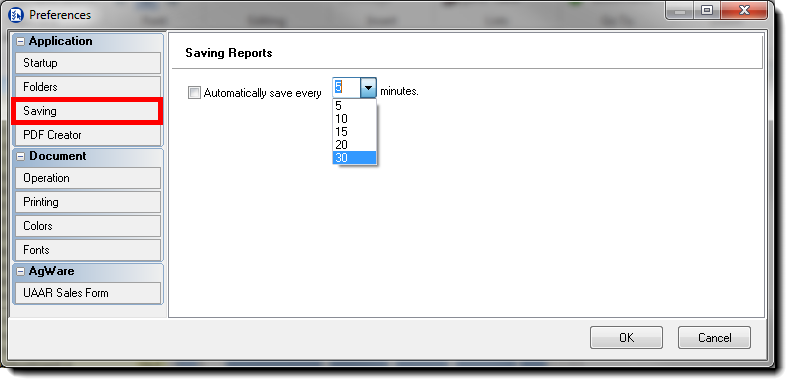
Saving
To set the auto-save feature, click the check-box and choose the preferred interval.
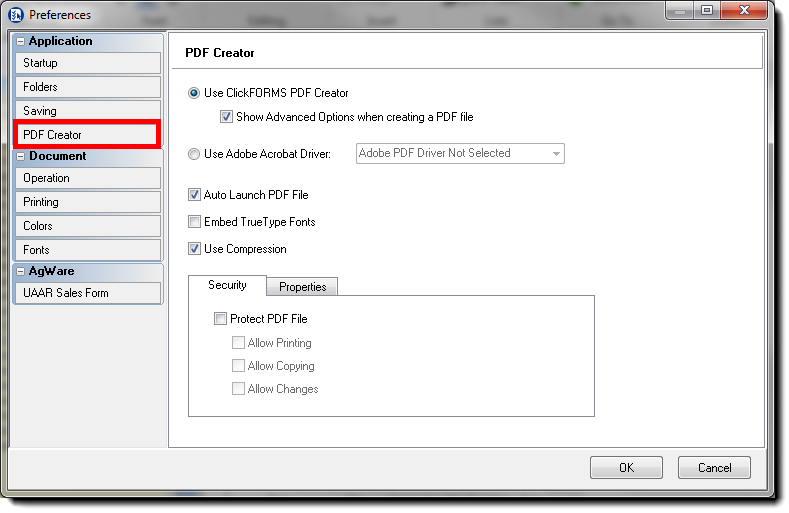
PDF Creator
There are two options for a PDF creator.
Choose the preferred method.
Document
The Document section includes Operation, Printing, Colors, and Fonts.

Operation
The Operation window contains several check-boxes and buttons, most of which are self-explanatory.
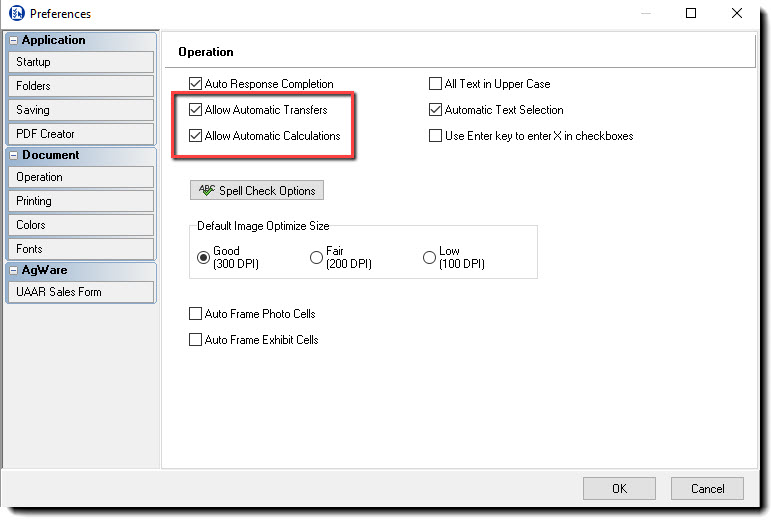
The two check-boxes highlighted above are checked by default. When a user experiences problems with data transfers or calculations in a report, these options have usually been unchecked. As always, when you change defaults know that there is some risk.
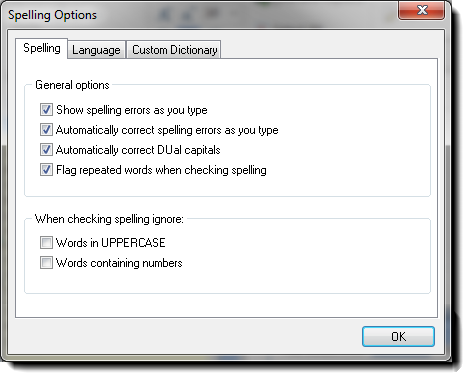
To edit Spell Check Options, click that tool-button to view the options window. To make changes to the Custom Dictionary, click the Custom Dictionary tab.
The default image optimization setting may be changed as preferred. AgWare recommends testing each of the settings for print quality, and then choosing the lowest acceptable option. It is always possible to adjust the setting for images within a report at the time optimization is initiated within the active report.
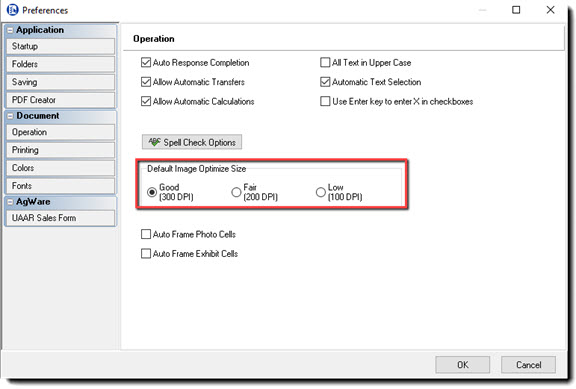
The AutoFrame options control the frames for image and exhibit cells. When checked, a frame will automatically be included once an image or exhibit is placed into a cell. Unchecked, the user must add frames individually.
Printing
The Printing section has three check-boxes.

To conserve on color ink costs, some users prefer that section titles be printed in gray rather than blue.
Turn on/off printing for certain fields like Net/Gross values. These can be shown on screen, but not printed.
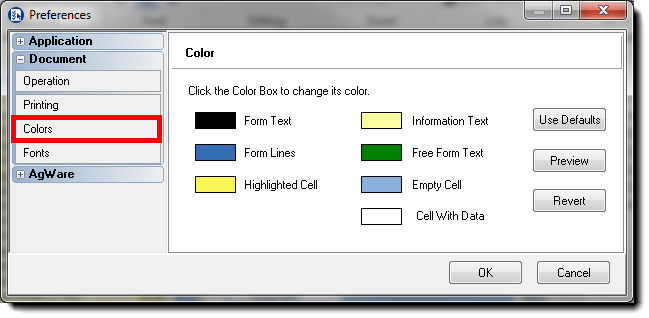
Colors
Make changes to certain color options in the Colors section.
To restore previous settings, use the Revert button.
To restore defaults, click the Use Defaults button.
Fonts
The font for the active report may be adjusted by clicking the Change Font button in the Fonts section.
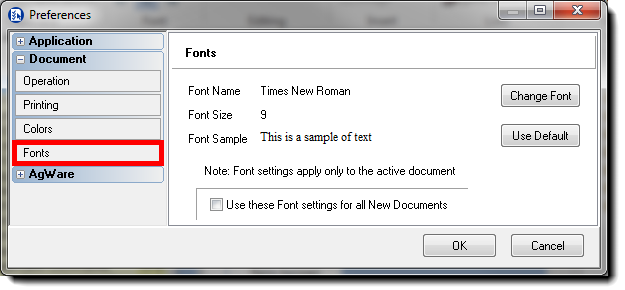
If the new setting is desired for all New reports, click that check-box. This will NOT affect the font for reports that were not created from “New” in the drop-down list.
AgWare

The AgWare section has only one option: UAAR Sales Form.
Choose the desired format for the default Paste (a sale) option.
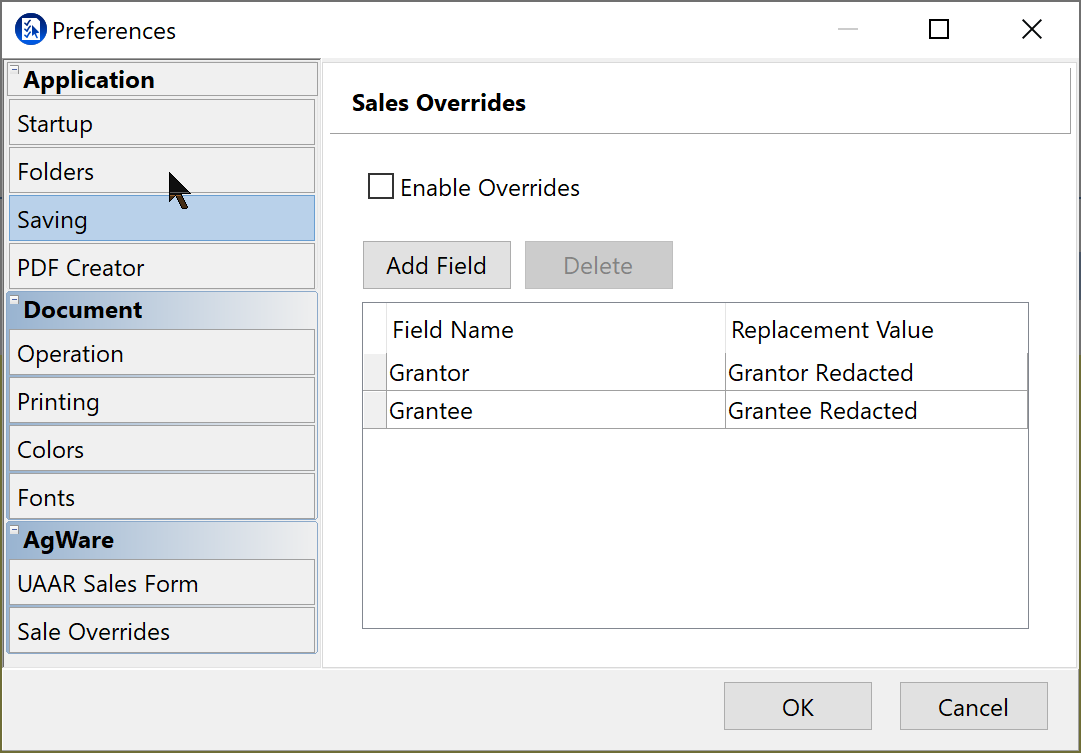
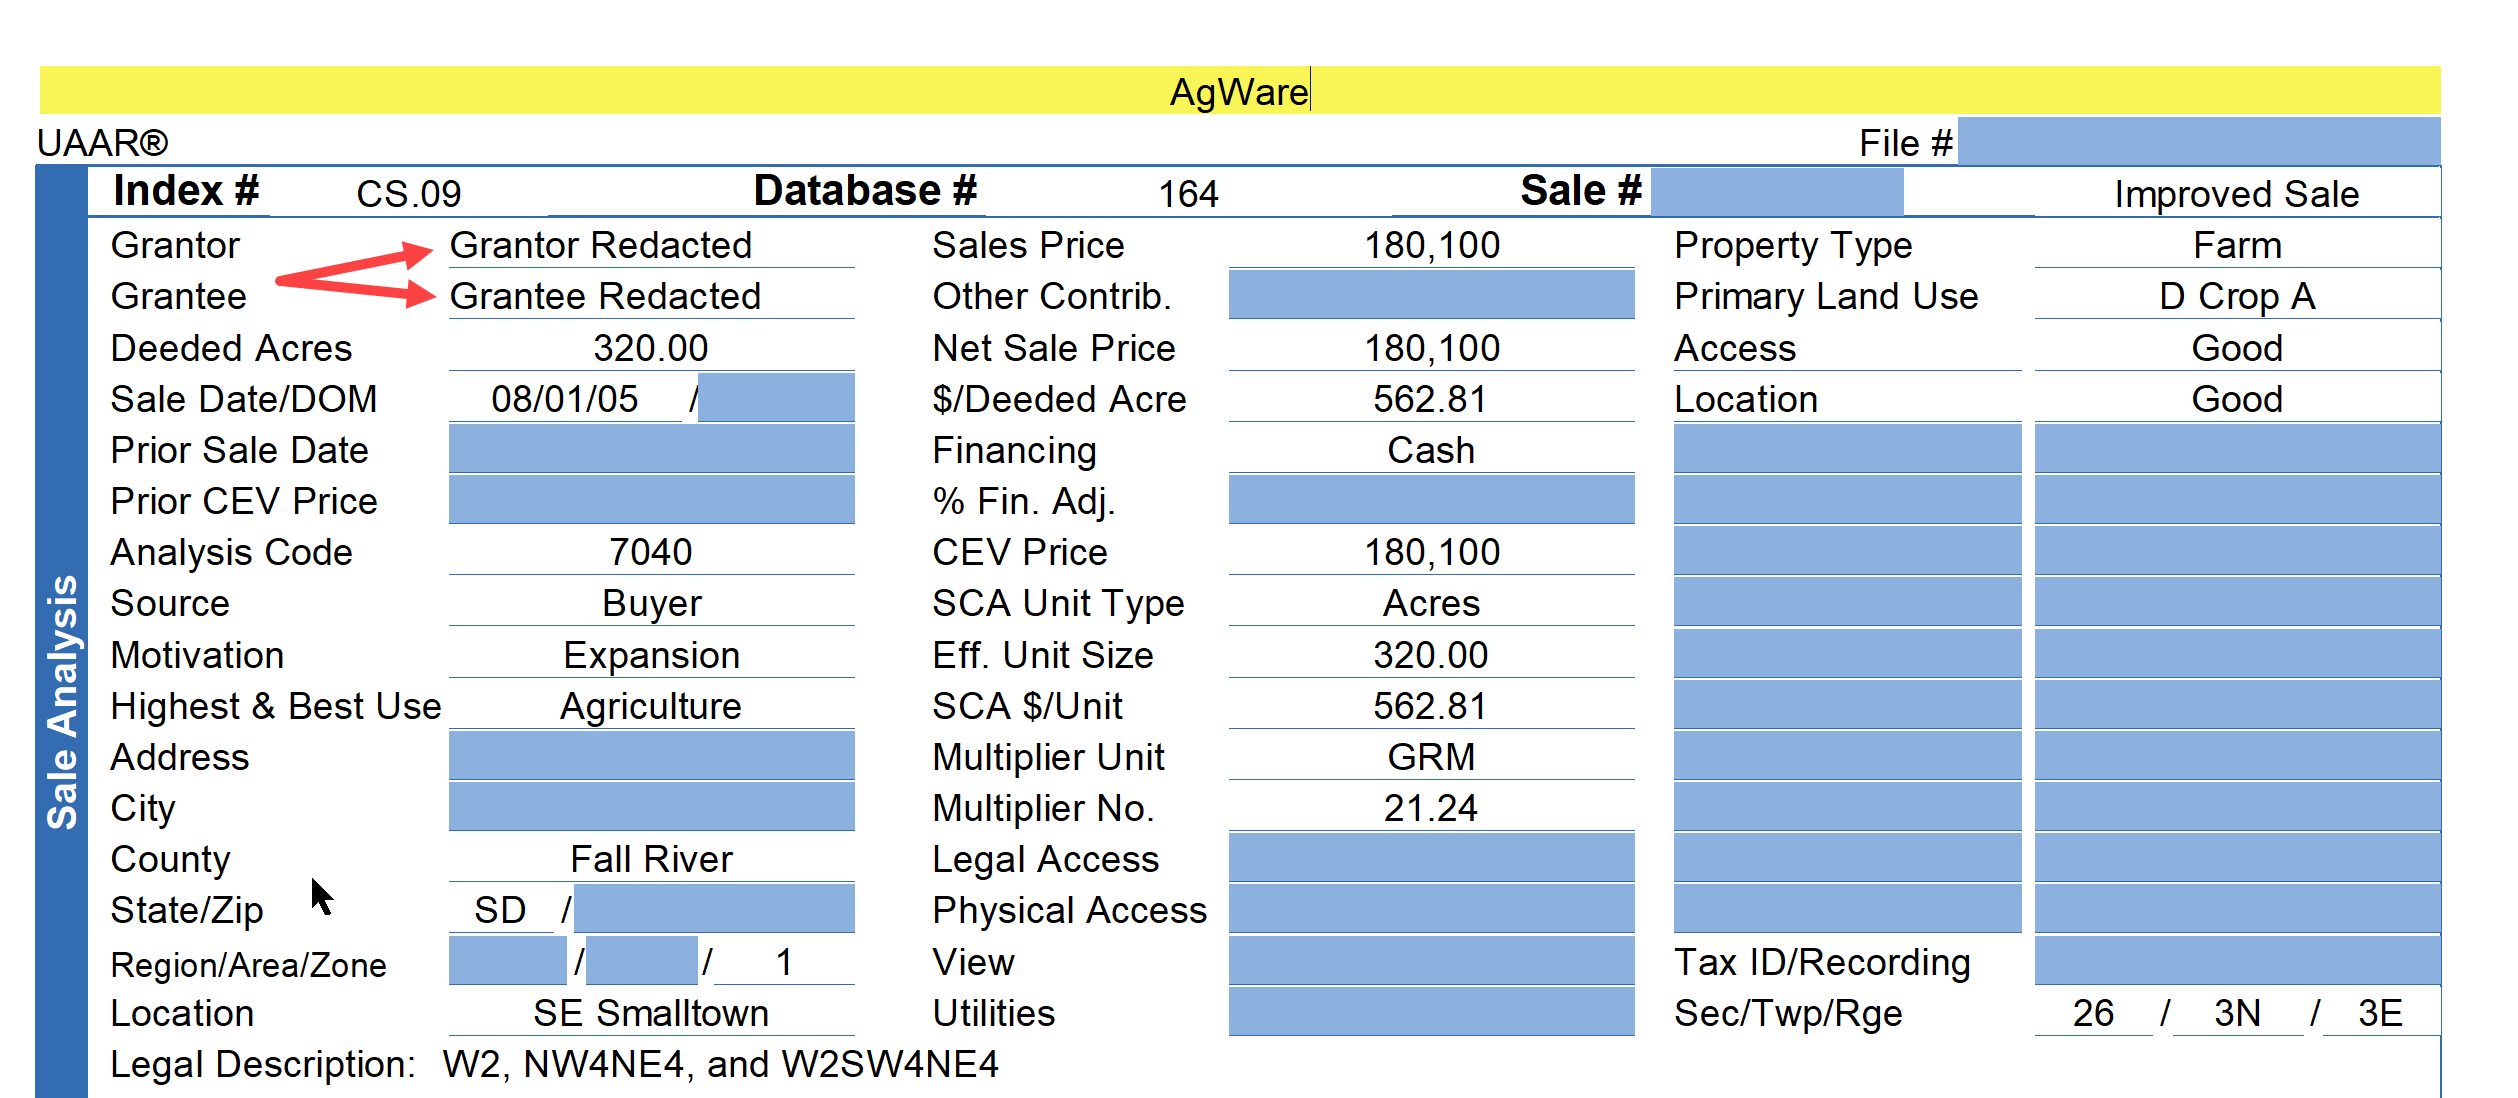
Sales Override
If there is a need for confidentiality, we have an option to pick any field and replace that field with a custom redaction.
In the example below, we are replacing Grantor and grantee with Grantor/Grantee Redacted